Deploying to NPM With GitHub Actions
These days, a “full-stack developer” is expected to know so much more than simply “front-end development” and “back-end development.” DevOps is a crucial part of software development, and without it, you are pretty much stuck with a working piece of software that only runs on your machine. Among all the threads that fall under the web of DevOps is continuous integration and delivery (CI/CD). In other words, automating your deployments.
Admittedly, I am not the biggest fan of DevOps. A few of my fellow developers know that it is the one aspect of software development that I will not touch unless I absolutely have to. That’s why, when it comes to deploying my own packages, I tend to gravitate towards the solution that is the easiest and quickest to set up. And when you are already using GitHub as your version control provider, there is really nothing simpler than GitHub Actions.
Introducing GitHub Actions
The biggest advantage of GitHub Actions is it’s already set up on your GitHub repo. You don’t even have to configure anything. And even better, a lot of the stuff you might want to do has likely been done by someone else, so you can probably find a workflow that you can just copy and paste into your package. In fact, if you have a JavaScript package, you can create a file called .github/workflows/npm-build.yml and paste this in:
name: NPM Build
on:
push:
branches: [main]
jobs:
build:
runs-on: ubuntu-latest
steps:
- name: Checkout Repository
uses: actions/checkout@v1
- name: Setup NodeJS
uses: actions/setup-node@v1
with:
node-version: 16
- name: Install Dependencies
run: npm install
- name: Install Peer Dependencies
run: npm i vue@3.1.2 @microsoft/signalr@5.0.7 --no-save
- name: Build Package
run: npm run build
- name: Run Tests
run: npm test -- --single-run --browsers ChromeHeadlessCI
- name: Run Linting
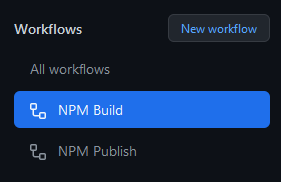
run: npm run lintSome of the steps might not apply to your project so you can remove them. This is more or less the actual workflow for @quangdao/vue-signalr. Let’s break down what’s actually happening here. If you’re not familiar with YAML, I recommend catching up on the syntax as I won’t be covering it in depth. At the start of the file, there’s a declaration for name. This is pretty self-explanatory; it is the name of the workflow, and how it will appear on your Actions dashboard:
After that, the on object is how you declare when the workflow triggers. In this example, the workflow will run whenever a change happens on your main branch. Although it says push, this will also include changes from merges and pull requests. You can also configure this to watch for pull requests to have a check that runs on PRs and ensure that your tests pass before the changes are merged in. Instead of a particular branch, you can also watch for tags. This is how I’m managing deployments to npm, so I’ll cover that later.
Finally, the jobs is where all the fun happens. The keys in this object (ie, build in this example) can be whatever you want, but should describe what you’re trying to accomplish with this job. The first property within the job itself is runs-on. I’ve never used anything other than ubuntu-latest which will run the build on the latest stable version of Ubuntu. Unless you have a need to run on a specific environment, there’s really no reason to get too adventurous here.
Following that are the steps to run for your workflow. steps is a YAML array, with each element representing a different step. Each one has a name, which, similar to the overall Workflow name, is used to label the steps in the Actions dashboard and can be whatever you want. Each step also includes either a uses or a run property. uses uses a pre-existing action, similar to Docker images if you’re familiar with that. Some actions accept additional params that you can set using with. You can see this in action in the Setup NodeJS step. run, on the other hand, allows you to run custom command line commands. The scripts in the example here are more or less how you would build the package locally and run tests and linting.
Deploying to NPM
The example I showcased above will build your package and run tests, but won’t actually interact with NPM in any way. To do that, you will first need to generate an access token on NPM.
- First, navigate to npmjs.com.
- At the top-right corner, click on your avatar, then “Access Tokens”
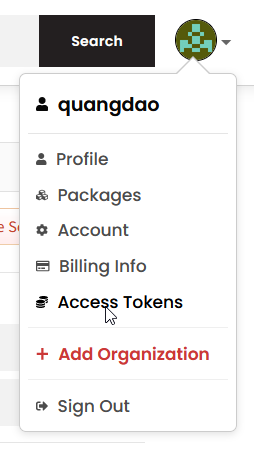
- Click on the “Generate New Token” button. This is located to the right of the header.
- Check the “Automation” option. If you need a read-only token to access a private organization’s package or a token to publish your packages manually, this is also where you can generate those. But for our purposes, we only need an Automation token.
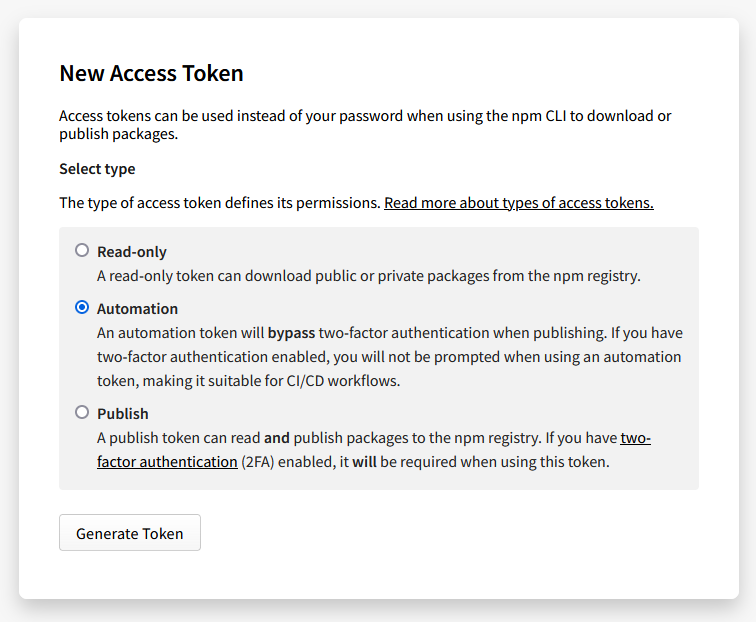
- Generate the token! After you click the button, you will get a notice with the full access token. Like with any access token, you’ll want to keep it handy, at least until you can configure your workflow.
Once you have your access token, there’s only one thing left to do: add the deployment to your workflow. Using the same example from above, just add this step:
- name: Publish to NPM
  uses: JS-DevTools/npm-publish@v1
  with:
    token: npm_<your token>
    access: public
That’s it. You’re done.
…
Just kidding! You never ever want to be committing secrets to your repo like this. Instead, we’ll save this as a secret on your GitHub repo. Let’s update the workflow first so we don’t forget. Replace your access token with ${{ secrets.NPM_TOKEN }}. Your publish step should actually look like this:
- name: Publish to NPM
  uses: JS-DevTools/npm-publish@v1
  with:
    token: ${{ secrets.NPM_TOKEN }}
    access: public
You might also notice the access option. In my case, the action defaults to restricted because it’s scoped under @quangdao/, however if your package is not scoped, you can leave this out. More information about this action can be found here.
Now that we’re done with our little detour, let’s get back to that token. Go to your GitHub repo, click on “Settings”, then “Secrets” on the sidebar. This should default to Action secrets, which is what we want. When you’re here, click on “New repository secret.”
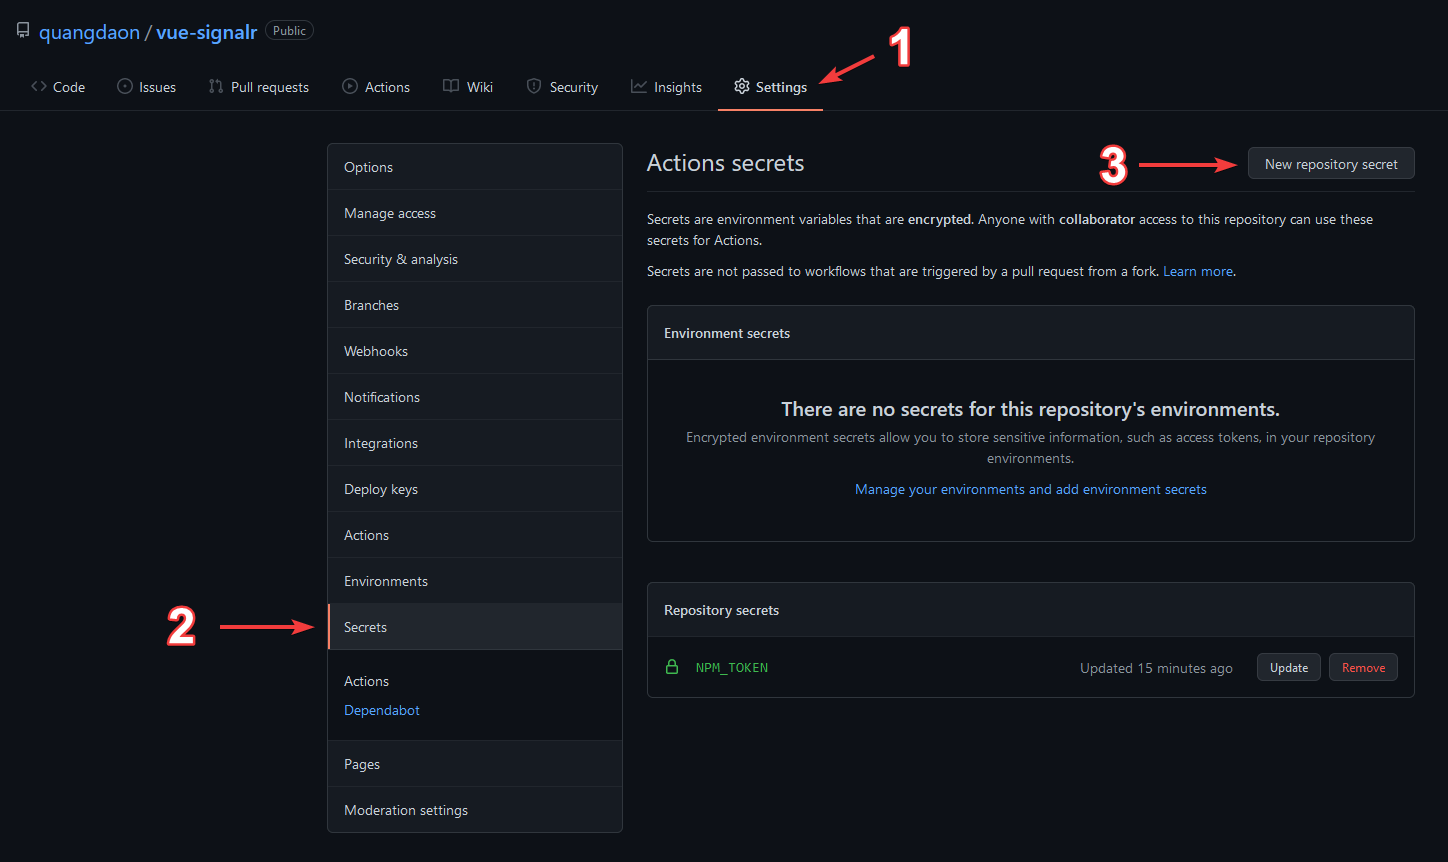
The name needs to match your workflow configuration, so unless you changed it from my example, this will be NPM_TOKEN. The value will be the token you generated.
Here’s what the full workflow file looks like now:
name: NPM Build

on:
  push:
    branches: [main]

jobs:
  build:
    runs-on: ubuntu-latest
    steps:
      - name: Checkout Repository
        uses: actions/checkout@v1

      - name: Setup NodeJS
        uses: actions/setup-node@v1
        with:
          node-version: 16

      - name: Install Dependencies
        run: npm install

      - name: Install Peer Dependencies
        run: npm i vue@3.1.2 @microsoft/signalr@5.0.7 --no-save

      - name: Build Package
        run: npm run build

      - name: Run Tests
        run: npm test -- --single-run --browsers ChromeHeadlessCI

      - name: Run Linting
        run: npm run lint

      - name: Publish to NPM
        uses: JS-DevTools/npm-publish@v1
        with:
          token: ${{ secrets.NPM_TOKEN }}
          access: public
This will trigger a deploy to NPM each time a change is made to your main branch. Although NPM will automatically reject any attempt to deploy an existing version and protect you from premature changes, this can get spammy and, well, it’s kind of rude. Instead, here is how I configure vue-signalr:
on:
  push:
    tags:
      - '*'
This will run whenever a tag is pushed to the repo. It doesn’t check the branch, so I can probably improve this a bit, but it works for my purposes. With this setup, here is how I deploy changes to NPM:
- Merge changes to
main. - Pull
maindown locally. - Run
npm version <patch|minor|major>(depending on the version change)- This will bump the version in the
package.jsonand add a Git tag with the appropriate version
- This will bump the version in the
- Push the change to GitHub (with tags!)
As I alluded to at the beginning of this post, I am no expert on DevOps, and my workflow can definitely be improved. The deployment process is still somewhat manual, since I still need to manually bump the version. This makes sense, because I want to control my releases. But if you have ideas on what I could do better, I’m open to any feedback!
Bonus Tip
I actually have a confession to make. The example workflow I showed at the beginning of this post is actually vue-signalr’s “Build” workflow (with a minor change), and throughout the post, I showed you how to mutate it to the “Publish” workflow. The minor change is that I run the Build workflow on PRs instead of pushes to main.
on:
  pull_request:
    branches: [main, release/*]
I had touched on this earlier, but GitHub will actually run this Action as a check and will disallow a PR from being merged if it fails. You can view the configurations for both workflows here.